Wednesday, October 8, 2008

Stamping Picture Frames and another Baby Card...

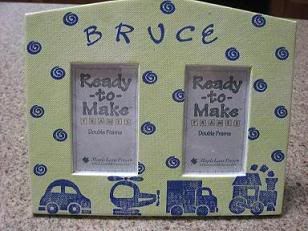
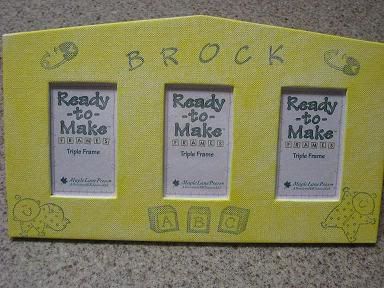
A friend of mine welcomed his second son into the family at the end of June. In celebration, I stamped a picture frame for the little guy, and didn't want to leave his big brother out, so I stamped one for him too. I've never made picture frames before, but this was pretty simple and they turned out almost exactly as I envisioned them! The card that I sent with the gift is below as well...


Operation Baking Gals - Round 3

Well, obviously I lied. I said I'd be updating this more frequently, and I sincerely plan to at some point. For now, I will at the very least entertain y'all with a post for the latest round of Operation Baking Gals.


This time I baked for CPT Christopher Dalske, you can read a little bit about him here. Considering that he's the unofficial morale officer, I have no doubt these cookies will be distributed to all around him, and I hope he gets a couple for himself too!

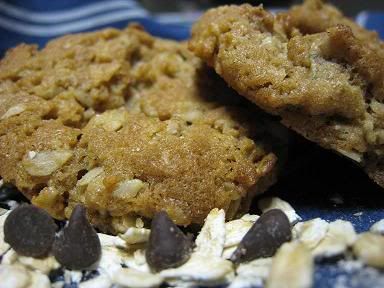
So, what did I make? Once again I pulled out that incredible cookbook, Baking from My Home to Yours by Dorie Greenspan and chose 2 different types of cookies. The first are Peanut Butter Oatmeal Chocolate Chipsters - which as their name implies has a little bit of everything in them! They turned out perfect - I really enjoyed them and they were pretty simple to make...


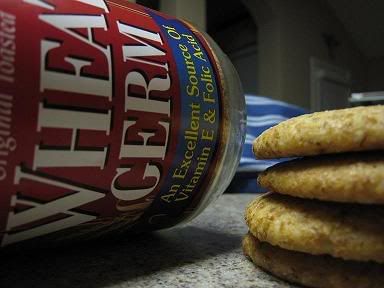
For the second cookie, I chose something a little different, and one that I would have probably skipped over time and time again in usual circumstances, but I'm glad I made them - they turned out pretty tasty! They were the Honey Wheat Cookies and their main ingredient, as you can see from the pic below is Wheat Germ. Who in the heck puts wheat germ in a cookie and makes it taste good!?!? Dorie, that's who! The lemon zest really kicked these up. I think I will make them for my dad sometime soon, they are cookies I think he would enjoy! And I might make a slight modification and sprinkle some sugar in the raw on top before baking to give them a little added sweetness, although these are good as they are!


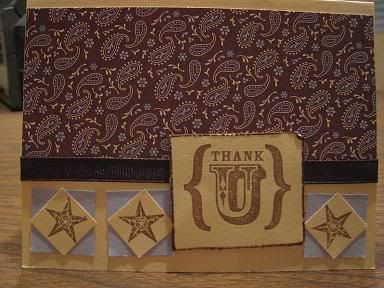
And last but not least, is the card! This time I included a card made by one of my very best friends, Courtney. She, myself and my other best friend Joanne got together one afternoon and had a great time making cards that we then shared with each other. This was Courtney's first time making cards, and she did a GREAT job! I helped her design the card (there was a template we needed to follow for the swap) and then she was off to the races! I loved the final result!


I hope you all have an incredible day! I hope to post again very soon! I just need to sit down on afternoon, write a ton of posts, and then schedule them to post automatically throughout the coming month. Then maybe I will be all caught up! And THAT'S a feeling I don't experience often! Ha!


In closing, thanks Operation Baking Gals for such an awesome event every month and a HUGE Thank You to Chris and those around him for serving our country. May God bless you and keep you in the palm of his hand...

Thursday, September 4, 2008

Chocolate Chunkers, Snickerdoodles and a Thank You Card


For my first month as a member of Operation Baking GALS, I got paired up with Susan from She's Becoming DoughMessTic, who is actually the brainchild of this great event! We are baking for Christopher Handy, who currently has a lot of young guys reporting to him, so in baking for him, we were also sending a touch of home to a lot of youngsters that are bravely defending our freedoms. If Christopher or his guys stumble upon this blog, THANK YOU AGAIN for your service - I sincerely appreciate all that you do!

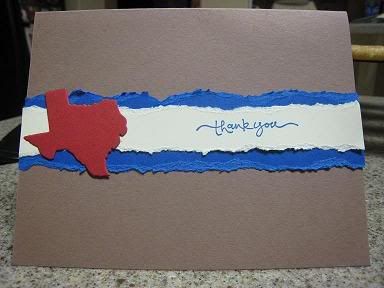
So what did I make and bake? Well of course I couldn't let the package ship out without a card. I wanted it to be simple, yet represent a little bit about me, so here's what I came up with...


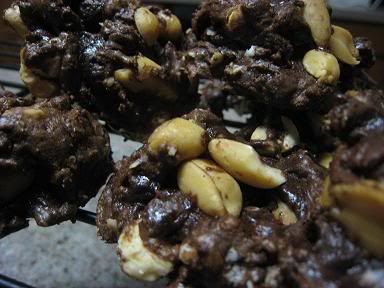
This could very well be the fastest card I've ever put together! And I liked the outcome a lot. But the guys really aren't going to care too much about a card, so on to the good stuff... I had a lot of chocolate in my freezer, and I wanted needed to get it out of the house! I was looking through Baking From My Home to Yours by Dorie Greenspan, probably my favorite cookbook for sweets now, and happened upon Chocolate Chunksters. I will say that when I was scooping out these cookies, I was a little leary that they would stick together and actually bake into a non-crumbly mess. And then when they first came out of the oven, I thought that they might be TOO chocolatey and would melt into a blob before they ever made it over to the troops. I'm crossing my fingers on that one still! But the day I was packing them up, they seemed more like a chocolate base cookie with lots of peanuts in them. I'm hoping that they survive, and if they don't, then I'm hoping that someone likes a blob of chocolate and peanuts!


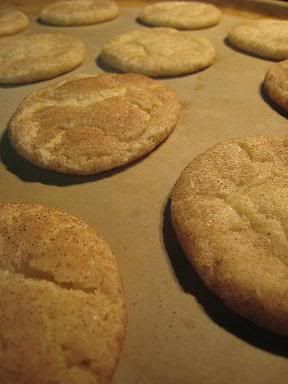
In addition to these, I thought I would make the classic Snickerdoodles - I knew they would make it there without melting, and who doesn't like the simple goodness of a light cookie with a little cinnamon sugar on top?!?! I got the recipe from Jayne of The Barefoot Kitchen Witch (she shipped these in her Operation Baking GALS package too!) Of course I taste-tested them before sending, and they came out perfect! I hope the guys enjoy these as well...

Before:


And after:


Thanks so much to Susan for putting this together! I look forward to baking again for the troops next month - I've already got the cookies I want to send in mind! :o)

God Bless!

Sunday, July 13, 2008

Baby Showers and Birthdays!

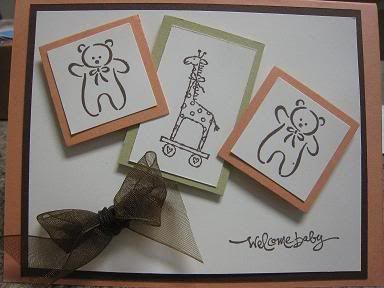
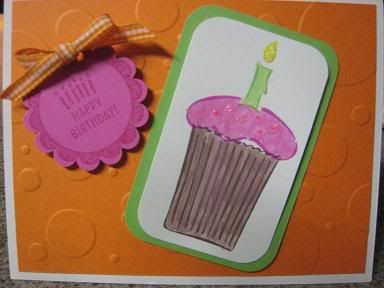
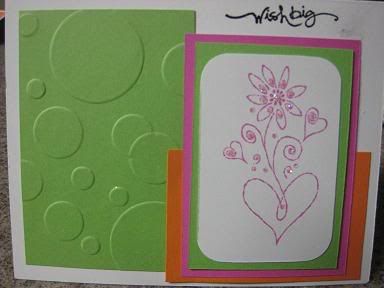
I was able to create a few cards this weekend for a baby shower for my good friend Melissa and then for some birthdays that we're celebrating at work this week. I leave for Birmingham REALLY early tomorrow morning - so I wanted to get these posted before I left!

The baby shower card was a bit of a challenge because she has decided to be surprised by the gender of the baby -so it had to be a gender neutral card! While it was challenging, this is probably one of my favorite cards that I've made...


These were for the birthdays at work this week. I am just kinda "eh" about them - I like them, but I probably won't be repeating them. The one with the orange background, I like, but I wish I would have used yellow instead of orange, but didn't have any yellow paper on hand - I'll have to add it to my order at the next stamp camp!


TWD - Cheddar Apple Scones

So in all of the madness of June, one of the Tuesday with Dorie recipes I missed was the Cheddar Apple Scones chosen by Karina of The Floured Apron. I finally made them this weekend and they were excellent. I agree with others that they were more like biscuits than scones that I've had in the past, but they've made quite a tasty breakfast, and brunch, and late-night snack, and dinner so far this weekend! LOL!

I made them according to the recipe, but at the last minute thought that bacon would make a nice addition - in my mind I was thinking of Applewood Smoked Bacon and then bacon and cheese kolaches - so it all seemed like a natural fit. And IT WAS!! I'm so glad I added it! I just used the 50% reduced fat Real Bacon Bits, which was so much easier than frying and chopping up bacon on my own, and it cleared up a little more room in my fridge as well! Bonus!


And ready to eat:

TWD - Double Crusted Blueberry Pie


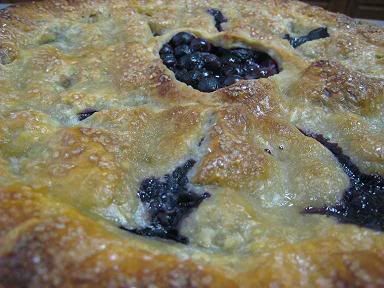
This week's TWD selection was made by Amy at South in Your Mouth. I was excited to see she picked the Double Crusted Blueberry Pie - it was perfectly suited for the week of July 4th! Of course I didn't MAKE it for the 4th, but enjoyed the blueberries being in season none the less! I made this yesterday for a group of girls in my bible study this summer. It's the same girls I took to Frontier Ranch in June. They were a little shy about digging in at first, but at the end, they did a good job finishing it off so I didn't have to come home with any leftovers. I laughed when one girl said it reminder her of "a mix of fruity pebbles and a pop tart! " Another girl looked at her with this look on her face and said "Did you just compare this pie that she made to a pop tart!?!" It was pretty funny... I think she got the fruity pebble vibe from the lemon zest that was included.

I thought all aspects of this pie came together pretty easily. I was a little nervous about the flour and sugar in the filling - I didn't want it to be gritty. So after I poured it all into the pie crust, I poured it all back into the bowl second guessing whether to include it all. What I forgot about was that there were bread crumbs in the bottom of my pie crust - EEK! I ultimately decided that Dorie knows best and just made sure the flour and sugar was incorporated into the berries pretty well (and the bread crumbs!) and poured it all back in hoping for the best. And from the looks of the pie plate at the end... there were NO ISSUES! And you couldn't taste the breadcrumbs in the filling, so nothing was ruined with my second guessing...

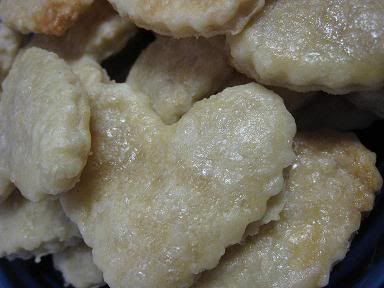
Oh, and I took a cue from one of the many TWD blogs I read and made little pie crust cookies with the remaining dough. The girls (and myself) definitely cleared those out as well - I'm happy not to throw away pie dough anymore!

TWD - Chocolate Pudding

Finally! I got something done on time! Amazing!


I'll admit - when I first saw the recipe for this week, I thought it was just a whole lot of work that Jello had just made a whole lot easier for us. And while I still think Jello pudding mixes have their purpose, now that I've had pudding from scratch, WOW. I have a whole new appreciation for pudding! Along the way, I thought it was all going to end up in the trash. It did NOT look good when moving it from the stove to the blender on the final run... but the blender made it all better! It tasted wonderful - a lot different than instant pudding - it wasn't really sweet, but more rich than normal...

The recipe was chosen by Melissa of It's Melissa's Kitchen - check out her blog for the recipe!


I found that the pudding was definitely the most challenging thing to photograph so far. Because it sat in the ramekins, when topped with coolwhip, you couldn't see the pudding, so I had to dig in and get some cross-sections. Dang the luck!

Thursday, July 10, 2008

Stamp Camp - June 2008

The theme for stamp camp last month was 'Watercolor'. We used a few different techniques including water color crayons and using drops of ink as well. Most people preferred the water color crayons, but at the time, I really liked just the tried and true drops of ink with an aqua painter. After having a few days separation, my water color crayon projects (the pear and the flower) didn't turn out too bad after all... Not sure if it justifies the cost of the crayons though.

Pears

Flower

Flowers

Glitter

The theme for swap cards this month was 'sympathy cards'. Here's the one I created - you'll recognize the color scheme and stamp set from the bookmark I made earlier in the month. I love chocolate (the color, and the food actually) with most colors, so this is one of my favorite color schemes. And it happens to be one of my favorite stamp sets too - I just don't get to use it all that often!

All I\'ve Created

Next month there's no set "theme' for stamp camp - we're just making a variety of cards. And the swamp is based on a layout - I'm interested to see what people come up with - myself included!

Thursday, June 19, 2008

TWD - Brown Sugar Pecan Shortbread Cookies

Obivously I made a substitution for this week - and I went back and did one of the first challenges instead for a few reasons...

1. I left on Saturday for Young Life camp in Colorado, so I wasn't going to be around for the week and didn't want to make something that would go bad.

2. I didn't have anywhere to take the Peppermint Cream Puff to - which considering my weight loss goals, is essential.

3. I needed a gift for my dad for Father's Day, and these were the ticket! He loves shortbread, and I figured I could wrap them up and they'd hold up in shipping, so it was a go!

These were pretty good - I think I overdid it with the pinch of cloves, but I'll be mindful of that next time. I liked the texture though!


Saturday, June 14, 2008

Bookmarks Galore!

I figured it was time for another update on my craft projects - there have actually been quite a few lately! Mainly I've been creating gifts for a lot of graduating seniors. I'm an adult volunteer leader for Young Life - I began last September. So it's my first time to have graduating seniors - and there were LOTS this year! There was no way I could afford to get them all something, so I decided I would take it upon myself to just make something. Considering they are all going off to college, and will be studying VERY hard, I thought bookmarks might come in handy, so I created a couple...


And then I needed to design a card for them to go in, and this is what I came up with - it reminded me of a concho belt when I got done with it...


And then this coming week I'm going to be in Buena Vista, CO at Frontier Ranch with the Young Life group as well and wanted the girls in my cabin to be able to take a little something back with them from me. There will be 15 of them though, so once again, buying stuff was cost prohibitive, so I created another bookmark!


The message on it says "All I have seen teaches me to trust the Creator for all I have not seen. -Ralph Waldo Emerson" - which is PERFECT for camp because one of the main points is to put the kids in one of the most beautiful places on earth, surround them with God's beauty and hopefully they will be inspired by it.

That's all for now - I've got to go pack!

Friday, June 13, 2008

Body for Life Cheesecake

Ok - a few years back I embarked upon Body for Life - and it WORKED. I did get burned out on it, and picked up my old (bad) habits again and in turn gained back the weight I lost. My fault though - nothing's going to work if you don't work at maintaining...

ANYWAYS - all of that to say that when I get back from Colorado (leaving on Saturday, returning on Sunday), I will be pushing forward with BFL once again. This week I decided to get a bit of it back into my routine and baked this BFL Cheesecake. It's not bad at all and has lots of protein in it thanks to cottage cheese and egg substitute...

First of all the picture (admit it - you would eat it based on looking at it - AND you would like it!)


And the recipe:

1 cup FF cottage cheese
1 cup egg substitute
12 oz FF cream cheese
3 TBSP Splenda (I use 6 TBSP based on reviews from others - and this is NOT Splenda for Baking, just normal Splenda)
1 TBSP Vanilla
1 RF Graham Cracker Crust

In a blender, mix the cottage cheese and egg substitute together - it will become smooth. Add in blocks of cream cheese a little at a time. Then add in the splenda and vanilla. Pour into the crust and bake at 350 for 35 minutes. Top with whatever your heart desires! I pureed strawberries so it would still be BFL friendly!

Tuesday, June 10, 2008

TWD - La Palette's Strawberry Tart

It's another Tuesday which brings us to another Tuesdays with Dorie!

This week Marie from A Year at Oak Cottage chose La Palette's Strawberry Tart. It's a very simple recipe - I made a few modifications (I can't seem to leave well enough alone) - so I changed the simple shortbread tart to a chocolate shortbread tart and I swirled a little semi-sweet chocolate and white chocolate on top just for funzies... Here are the pics - enjoy!


Next week is a Peppermint Cream Puff, but I'm not sure if I can make it because it requires a stand mixer... I'll see what I can do!

Monday, June 2, 2008

TWD - French Chocolate Brownies


So in my perusal of cooking/baking blogs, I came across a group called Tuesdays with Dorie. The concept is that each week we bake a different recipe from the book, Baking From My Home to Yours by Dorie Greenspan. I finally plunged in, bought the book and this week marks my first official participation as a member of the TWD group! And what a way to start - French Chocolate Brownies chosen by Di of Di's Kitchen Notebook.

These brownies are amazing. Perfect and fudgy with a flaky, sugary top. And chocolate, oh my, chocolate. Perfect balance!


These brownies are supposed to be made with rum-soaked raisins, but I opted out of that part. #1, I'm not a big raisin fan and #2 I didn't want to go buy dark rum just for brownies. So I made them without, and this might very well become my default brownie recipe - they were awesome and easy easy to put together...

French Chocolate Brownies (from Baking From My Home to Yours)

makes 16 brownies

Ingredients

1/2 cup all-purpose flour
1/8 teaspoon salt
1/8 teaspoon cinnamon (optional, I didn't use it)
1/3 cup raisins, dark or golden
1 1/2 tablespoons water
1 1/2 tablespoons dark rum
6 ounces bittersweet chocolate, finely chopped (I used 1/2 bittersweet 1/2 semisweet)
1 1/2 sticks (12 tablespoons; 6 ounces) unsalted butter, at room temperature and cut into 12 pieces
3 large eggs, at room temperature
1 cup sugar

Getting ready: Center a rack in the oven and preheat the oven to 300°F. Line an 8-inch square baking pan with foil, butter the foil, place the pan on a baking sheet, and set aside.

Whisk together the flour, salt and cinnamon, if you're using it.

Put the raisins in a small saucepan with the water, bring to a boil over medium heat and cook until the water almost evaporates. Add the rum, let it warm for about 30 seconds, turn off the heat, stand back and ignite the rum. Allow the flames to die down, and set the raisins aside until needed.

Put the chocolate in a heatproof bowl and set the bowl over a saucepan of simmering water. Slowly and gently melt the chocolate, stirring occasionally. Remove the bowl from the saucepan and add the butter, stirring so that it melts. It's important that the chocolate and butter not get very hot. However, if the butter is not melting, you can put the bowl back over the still-hot water for a minute. If you've got a couple of little bits of unmelted butter, leave them—it's better to have a few bits than to overheat the whole. Set the chocolate aside for the moment.

Working with a stand mixer with the whisk attachment, or with a hand mixer in a large bowl, beat the eggs and sugar until they are thick and pale, about 2 minutes. Lower the mixer speed and pour in the chocolate-butter, mixing only until it is incorporated—you'll have a thick, creamy batter. Add the dry ingredients and mix at low speed for about 30 seconds—the dry ingredients won't be completely incorporated and that's fine. Finish folding in the dry ingredients by hand with a rubber spatula, then fold in the raisins along with any liquid remaining in the pan.

Scrape the batter into the pan and bake 50 to 60 minutes, or until the top is dry and crackled and a knife inserted into the center of the cake comes out clean. Transfer the pan to a rack and allow the brownies to cool to warm or room temperature.

Carefully lift the brownies out of the pan, using the foil edges as handles, and transfer to a cutting board. With a long-bladed knife, cut the brownies into 16 squares, each roughly 2 inches on a side, taking care not to cut through the foil.

Serving: The brownies are good just warm or at room temperature; they're even fine cold. I like these with a little something on top or alongside—good go-alongs are whipped crème fraiche or whipped cream, ice cream or chocolate sauce or even all three!

Storing: Wrapped well, these can be kept at room temperature for up to 3 days or frozen for up to 2 months.

Baby Shower Cards

I went to a baby shower for a friend this weekend and made a couple of cards that turned out pretty cute...

The first one was for a gift for the mom (vs. a gift for the baby). A group of us went in and got her a gift certificate for a pedicure or a massage, but wanted it to be pretty. So I came up with this 'presenter' for the GC:


And then for the gift that I gave her, this is the card I made:


More projects coming soon - including birthday cards, sympathy cards, and bookmarks!

Friday, May 30, 2008

Multi-Event Card

Last year I got a friend a gift that was a little more than what I typically would give someone, but it was for his birthday, his new house, a thank you for always watching my dogs when I needed him too, and just for grins I threw in Christmas as well...

Here's what the card I made to go along with the gift looked like (the colors are a little distorted because I scanned this one in instead of taking a picture of it - oops!):


I should have more cards to upload this weekend!

Monday, May 26, 2008

Memorial Day Grub

Although I didn't have big plans this holiday, I did want to cook. Problem was that I was the only one home this weekend - was there any point to cooking all of the food I wanted to? But I decided I would do it and would just end up eating it ALL WEEK...

Here's the menu:
Oven Baked Brisket
Creamy Cilantro Potato Salad
Squash and Zucchini Sauté
Simple Whole Wheat Bread
Double Chocolate Brownies

We'll start with the brisket. I don't quite have my smoker over here yet, so the only option was to do it in the oven. And who better to get a recipe for a southern meal from than Southern Living? I found this recipe for Oven Baked Brisket on their website and it had 5 stars and great reviews - so it went on the to-do list...

Next came the potato salad - I was browsing cooking websites and my love for cilantro came into play when I saw a recipe for Creamy Cilantro Potato Salad on A Taste of Home Cooking. I didn't get any pictures of the finished product because to tell the truth, it didn't look as good as it tasted - and it tasted great! Not as creamy as I typically have it, but less mayo means less fat and that's not a bad thing... Here are some pics of the preparation though:


And next up is the Squash/Zucchini Sauté. Although I've made squash many times before, I typically throw it in a pot and boil the crap out of it. Tastes somewhat good, but when I came across another way to prepare it on Dianne's Dishes, I decided it would make a good side dish for the meal. Once again it wasn't too pretty once it was all prepared, but the prep looked good!

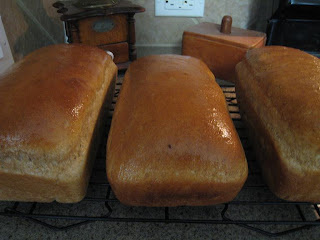
Next came what was probably my favorite part of the entire day. I've always wanted to make homemade bread, but I've been very intimidated by it for some reason. I figured I could try it though, and if it failed miserably, I would just throw it away and pretend it never happened. But it didn't fail AT ALL - it worked out wonderfully - I was acutally surprised everytime it actually did rise as it should have! I got the recipe from Piggy's Cooking Journal - and I'm SO GLAD I did! I just actually enjoyed it for breakfast as well... can't complain!

And last but not least was dessert. If I were to pick one favorite blog to go to for desserts, it would definitely be Bake or Break - her desserts are INCREDIBLE yet not overly complicated either... I wanted to make some brownies, so I chose her Double Chocolate Brownies. The leftovers will certainly be brought to Young Life tomorrow night, because they are not safe in my house!


And that's what kept me in the kitchen for most of the day yesterday. And luckily my neighbors came over last night to help me make a dent in it! Now to go finish the dishes... ugh.