
Well, I just got back from my annual skitrip in Steamboat Springs, CO - and it did not disappoint! I had a great time skiing and got to see some amazing performances, but I'll talk more about that on Thursday... for now, I'll focus on the food.
I did the majority of the cooking for the people in my condo this trip, not because I had to, but because it's something I love to do. In addition to our nightly meals, I also threw a dinner party for a couple of my favorite bands - and their wives, girlfriends, soon-to-be fiancés, sisters, etc, etc, etc. By the time all was said and done, I think there were ~22 people in a condo made for 6 people - we were cozy to say the least! Ha ha!
Anyways - I always tend to get asked for the recipes I use, so I thought I'd just share them all here. I don't have pictures - just links to the recipes I used. And as I've stated before, I'm not one to come up with new recipes in the kitchen, my forté is recognizing what will be good once it's all said and done, and then making it! So here are all of the recipes I used throughout the trip...
Day 1: Dinner party
Salad - no recipe - just make a salad people.
Garlic Cheese Bread - Oh me. Oh my. I could have eaten this for dinner and been 100% content. It was freaking good. And it was even good when we got home from going out that night and had what was left of it... YUM!
Pioneer Woman's Lasagna - Well, I think this was pretty good. And the reason I 'think' is because I didn't actually have any. I was a few servings short on this one dish, but everyone said it was awesome, so I guess I'll have to make it for myself again sometime! And I used all turkey meat in this version (2lbs of ground turkey and 1 pkg of turkey sausage links) - no one would ever know...
Tuscan Chicken Simmer - I made this in addition to the lasagna just to have some variety. I doubled the recipe and there was definitely enough to go around. And the leftovers were eaten up the next day, so obviously it was worth returning to! I'll definitely make it again - easy and good - I love me some pesto!! (I made it with farfalle pasta and it worked really well, I think better than it would work with spaghetti, and I sauteed bite-size pieces of chicken rather than whole chicken breasts so it would feed a crowd more easily).
Pioneer Woman's Apple Dumplings - Another shining spotlight - people were talking about these all week! SO SO GOOD! I would only allow myself one after seeing what all went into it, but it's worth the rare indulgence! And I used diet Mountain Dew and it was just fine... if you want to cut *some* calories along the way...
Day 2:
Enchilada Casserole - this is a recipe that my family has made for YEARS. I think we got it out of a Fredricksburg cookbook when we were on a family vacation. I can't even begin to count the number of times I have made this one, and it never fails...
1 lb ground beef (you can use turkey too, or even sauté cut up chicken breasts)
1 pkg taco seasoning
8 flour tortillas
1 can cream of mushroom soup
1 can milk (fill up the CoM soup can)
2 cups shredded cheese
1. Preheat oven to 350*
2. Mix the ground meat and taco seasoning to make taco meat.
3. Mix the Cream of Mushroom soup and 1 can of milk and heat through.
4. Cut the tortillas into bite size pieces (I use a pizza cutter for this)
5. Spray 9X13" pan and layer 1/2 of tortillas, then 1/2 of meat, then 1/2 of soup mixture, then 1/2 of cheese. Repeat layers.
6. Bake for 30 minutes.
That's it. For this trip I did 3 layers (additional ingredients, but not quite double everything either). I knew it needed to feed quite a few people, and would make a great late night snack when returning from the concerts/bars. I was right.
Creamy Jalapeno Dip - This Chuy's classic goes PERFECTLY with the Enchilada Casserole. I ended up making 2 batches throughout the week because I knew it would go fast. And it did. I also make the Spicy Crackers that can be found in the same recipe post from a couple years ago...
Day 3:
Pot Roast and Creamy Mashed Potatoes - Both of these recipes are also from Pioneer Woman's site - can y'all tell I like the way she cooks? I've only had pot roast with red wine one other time, and I turned up my nose. I think it was just because it wasn't what I was used to (roast + onion soup mix), so I decided I'd give it another shot. Everything else seemeed like it would work, and I haven't had one of PW's recipes fail me yet, so I went with it. Thank goodness it was a success and people enjoyed it. And these mashed potatoes... well, I think it's the only recipe I'll use going forward. I made them for this meal and I made them for Christmas dinner too - YUMMY!!!
Day 4:
Almond Chicken Casserole - This was just something easy that could be cooked and frozen quickly and would heat up well once we got there. And it did just that! I didn't have to worry about a thing...
Day 5:
Ranch Chicken Pot Pie - This recipe is from Picky Palate and it was really, really good. So good that I had seconds later on the same night! And a guy that was with us told me that he didn't even like chicken pot pie (as I was pulling it out of the oven!) even gave this one the thumbs up... it was EASY to make and super tasty! I'd make it again in a heart beat!
Lunch/Random:
Michelle's Chili - I got this recipe from a friend of mine. She's made it numerous times and a lot of other people I know have made it well and it's always gotten good reviews. This was all gone at the end of the week - along with bags of fritos and lots of cheese - the ultimate way to consume chili IMO... Thanks for sharing Michelle!
2 pounds ground beef chuck
2 large white onions, chopped
2 (14.5 ounce) cans diced tomatoes with juice
2 (15 ounce) cans tomato sauce
1 (12 fluid ounce) can beer
2 (15 ounce) cans spicy chili beans
1/4 cup Worcestershire sauce
3 tablespoons hot pepper sauce (e.g. Tabasco™), or to taste
1/3 cup chili powder
3 tbsp cumin
4 fresh jalapeno peppers, seeded and chopped (I use 4 TBSP jarred jalapenos)
Cook beef, then let all simmer on stove for up to 2 hours.
And that is it my friends... if you see anything that's missing, please let me know!
Showing posts with label Monday Munchies. Show all posts
Showing posts with label Monday Munchies. Show all posts
Monday, January 11, 2010
Monday, November 23, 2009
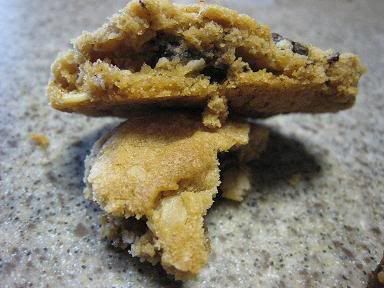
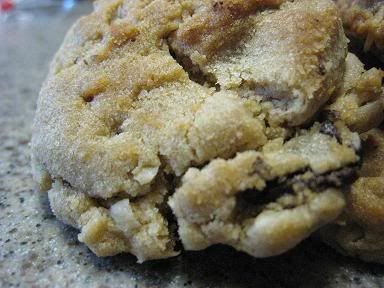
Monday Munchies - Oatmeal Peanut Butter Chip Cookies
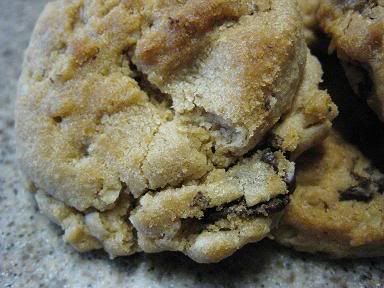
So once again I bring you Monday Munchies with a great cookie I sent along with last week's Chocolate Toffee Cookies to the troops last month as a part of Operation Baking Gals... This recipe came from My Baking Addiction, which I've mentioned on here before. It combines peanut butter and chocolate, along with enough oatmeal to allow you to pretend you're being healthy! Ha ha! And yes, they were as yummy as they look!
Oatmeal Peanut Butter Chip Cookies
Adapted from My Baking Addiction which adapted from allrecipes
makes: about 18 cookies
Ingredients
1/2 cup butter
1/2 cup white sugar
1/3 cup packed brown sugar
1/2 cup peanut butter
1/2 teaspoon vanilla extract (I used Beanilla Vanilla Paste)
1 egg
1 cup all-purpose flour
1 teaspoon baking soda
1/4 teaspoon salt
1/2 cup rolled oats
1 cup peanut butter and chocolate swirl chips (your favorite chocolate chip will be just fine)
Method
1. Preheat oven to 350 degrees F (175 degrees C).
2. In a medium bowl, cream together the butter, white sugar and brown sugar until smooth. Stir in the peanut butter, vanilla and egg until well blended.
3. Combine the flour, baking soda and salt; stir into the batter just until moistened. Mix in the oats and chocolate chips until evenly distributed. Drop by tablespoonfuls on to lightly greased cookie sheets.
4. Bake for 10 to 12 minutes in the preheated oven, until the edges start to brown. Cool on cookie sheets for about 5 minutes before transferring to wire racks to cool completely.
NaBloWriMo: Day 23
Monday, November 16, 2009
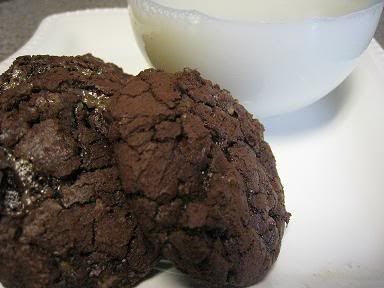
Monday Munchies - Chocolate Toffee Cookies
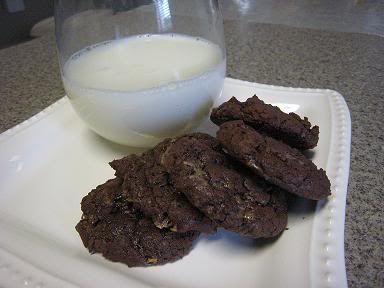

It was once again time to send some cookies to our soldiers through Operation Baking GALS and this was one of my contriubtions.
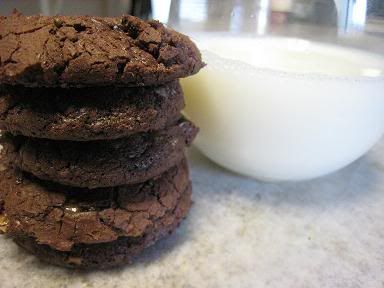
They were AWESOME. Pure chocolatey goodness plus toffee! I brought some to work and people have been asking for the recipe, so here it is! I found this on a blog called My Kitchen Cafe who's tagline, "tried and true from my kitchen to yours" fits me perfectly. I'm not one to create new recipes, I'm just good at finding creative recipes and re-creating them. Some are duds, but for the most part I know when things are worth making...
Chocolate Toffee Cookies
1/2 cup all purpose flour
1 teaspoon baking powder
1/2 teaspoon salt
1 pound semisweet chocolate, chopped (do not substitute chocolate chips since they melt differently; I used chocolate from Trader Joes, but you could also use the bars from the baking aisle)
1/4 cup (1/2 stick) butter
1 3/4 cups (packed) brown sugar
4 large eggs
1 tablespoon vanilla extract
5 1.4-ounce chocolate-covered English toffee bars, coarsely chopped (I just used the Heath Toffee Bits I found in the baking aisle)
Whisk flour, baking powder and salt together in small bowl. Place chocolate and butter in a microwave-safe bowl and heat on 50% power for two minutes. Stir and continue microwaving in one minute (50% power) increments, stirring after each minute, until chocolate and butter are melted and combined. Cool mixture to lukewarm.
Using electric mixer, beat sugar and eggs in bowl until thick, about 3 minutes. Beat in chocolate mixture and vanilla.
Stir in flour mixture, then chopped toffee bars. Chill batter until firm, about 45 minutes.
Preheat oven to 350°F. Line 2 large baking sheets with parchment or waxed paper. Drop batter by rounded tablespoonfuls onto sheets, spacing two inches apart. Bake just until tops are dry and cracked but cookies are still soft to touch, about 12 to 15 minutes. (Can be made 2 days ahead. Store airtight at room temperature.)
Recipe Source: adapted from The Kitchen Cafe who adapted from Smitten Kitchen originally from Bon Appetit
NaBloWriMo: Day 16
Monday, November 9, 2009
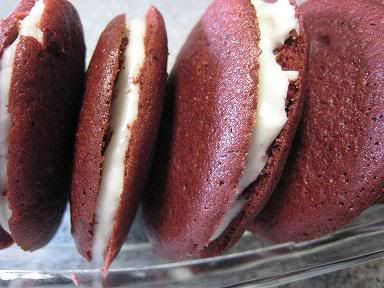
Monday Munchies - Red Velvet Sandwich Cookies (aka Little Deborahs)
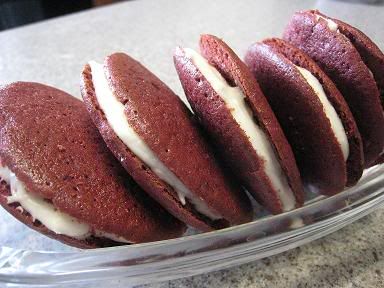
So my friend Trisha was having a birthday a few weeks back, so I asked what her favorite cake was, to which she immediately responded 'Red Velvet with Cream Cheese Icing'. The issue was, I didn't want to bring a CAKE. I wanted something more transportable. Cue cupcakes. BUT they are still messy. I wanted to do away with the mess factor. Then I came across a recipe for Red Velvet Ice Cream Sandwiches on the Tender Crumb blog. Obviously I wasn't going to make the ice cream, but I could use the Red Velvet Cookie idea and sandwich it with awesome cream cheese icing like the all-time favorite Oatmeal Cream Pie - and that's exactly what I did!
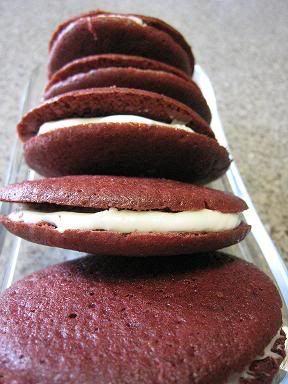
This recipe made quite a few, so Trisha kept one container, and shared the rest with some friends. As the first one was being eaten, he said ' These are awesome - you need to sell these all the time! Come up with a name!' It obviously started out as a joke, but over the next few days I was trying to figure out what I would call this concoction of mine, even though there were no intentions of selling them. And then it hit me... They were to be called the 'Little Deborah - a simply gourmet sandwich cookie'... A riff on Little Debbie snack cakes, and it made me laugh. Now I just need to work on other flavors. Carrot Cake w/Cream Cheese Icing and German Chocolate Cake w/ coconut/pecan icing are next on the list!
Red Velvet Cookies
adapted from Every Day w. Rachel Ray
makes approx 20 cookies (I found that it makes a LOT more than 20 cookies, based on using the tablespoon cookie scoop)
Ingredients
1 1/4 cups flour
1 1/2 tbsn unsweetened cocoa powder
1/2 tsp baking soda
1/2 tsn salt
5 tbsp unsalted butter, at room temperature
3/4 cup granulated sugar
1 large egg
1 tbsn red food coloring
1 1/2 tsp pure vanilla extract
1/2 cup buttermilk
Directions
1. Preheat the oven to 350°. Line a baking sheet with parchment paper. In a medium bowl, sift together the flour, cocoa, baking soda and salt.
2. Using a mixer, beat butter with the granulated sugar until fluffy, 3 minutes. Beat in the egg, food coloring and 1 teaspoon vanilla. Beat in the flour mixture alternately with the buttermilk until smooth.
3. Place 1/4-cup scoops of batter 2 inches apart on the prepared baking sheet; spread out. Bake until a toothpick inserted in the center comes out dry, 12 to 15 minutes. Let the cookies sit for 5 minutes, then transfer to a rack to cool.
Cream Cheese Icing
Ingredients
1 (8 ounce) package cream cheese, softened
2 tablespoons butter, softened
4 cups confectioners' sugar
1 teaspoon vanilla bean paste (extract will also work)
2 tablespoons milk
Method
Mix the cream cheese with the butter, confectioners' sugar, vanilla extract, and milk in a bowl. Heat in a microwave for 15 seconds. Drizzle spoonfuls over the cooled cookies and smooth with the back of a spoon or a spatula.
(I added powdered sugar until the 'icing' was a little thicker. It's the same recipe I used for my Pumpkin Cookies with Cream Cheese Icing, but needed the consistency to be thicker so it wouldn't run out of the middle of the cookies. It needed to be more like Frosting than Icing, if that makes any sense at all...)
Enjoy!
NaBloWriMo: Day 9
Monday, November 2, 2009
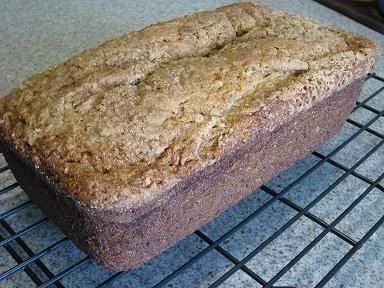
Monday Munchies - Banana Bread
NaBloWriMo: Day 2
So lately I've been making a LOT of banana bread...
1. It's EASY.
2. There are always bananas in my freezer (that's where I put them when they start going ripe - when they defrost you can use them for baking - they are perfect for it!)
3. I found a recipe that is a HIT and I modified it to make it a little healthier
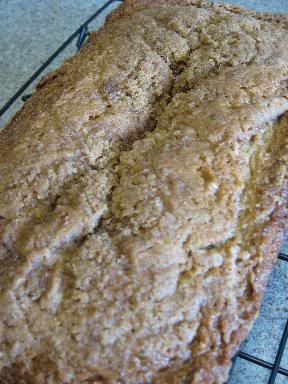
Banana Sour Cream Bread
from Allrecipes
modified by ME!
Ingredients:
2 tablespoons splenda for baking
1 teaspoon ground cinnamon
1/2 cup butter
1/4 cup applesauce
1 1/2 cups splenda for baking
1 egg
3 egg whites
6 very ripe bananas, mashed
1 (16 ounce) container reduced fat sour cream
2 teaspoons vanilla extract
2 teaspoons ground cinnamon
1/2 teaspoon salt
3 teaspoons baking soda
3 cups whole wheat flour
1 1/2 cups all-purpose flour
Directions:
1. Preheat oven to 300 degrees F (150 degrees C). Grease four 7x3 inch loaf pans (or 2 normal size loaf pans). In a small bowl, stir together 2 tablespoons of splenda for baking and 1 teaspoon cinnamon. Dust pans lightly with cinnamon and sugar mixture.
2. In a large bowl, cream butter, applesauce and 1.5 cups of splenda for baking. Mix in egg/egg whites, mashed bananas, sour cream, vanilla and cinnamon. Mix in salt, baking soda and flour. Divide into prepared pans.
3. Top with streusel if desired (I always desire streusel! - Recipe below)
4. Bake for 1 hour, until a toothpick inserted in center comes out clean (or 1 hr 20 min for regular sized loaf pans). Make sure you do the toothpick test, right in the middle to ensure that it is baked completely through.
This recipe can be cut in 1/2 easily.
Streusel Topping recipe:
1/2 cup brown sugar
1/2 cup flour
2 tablespoons butter
1 teaspoon cinnamon
Mix together until crumbly.
Monday, October 12, 2009
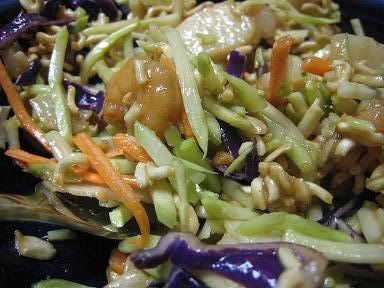
Monday Munchies - Asian Slaw Salad
Ok, so it seems from what I've posted so far that the majority of my work in the kitchen revolves around stuff that isn't exactly good for you. That's not entirely true though, it's just that the sweet stuff is a lot more fun to photograph and talk about.
Within the past year I came across a really simple salad that is healthy, easy and tastes good - I call it a Asian Slaw Salad.

Ingredients:
1 bag of broccoli slaw
1 package of ramen noodles, oriental flavor
1/4c sunflower seeds
1/4c Reduced Fat Toasted Sesame Asian Dressing
Protein of choice (I usually sauté some shrimp or chicken in soy sauce and sesame oil)
Mix the broccoli slaw and sunflower seeds. Sprinkle with the oriental seasoning from the ramen noodles. Drizzle dressing on top and mix thoroughly. Crush up the ramen noodles and place them, along with the protein, on top of the salad.
Enjoy!
P.S. Put the ramen noodles on right before eating or they lose their crunch, and their purpose, in the salad. This is especially helpful if you're taking the salad as leftovers...
Within the past year I came across a really simple salad that is healthy, easy and tastes good - I call it a Asian Slaw Salad.
Ingredients:
1 bag of broccoli slaw
1 package of ramen noodles, oriental flavor
1/4c sunflower seeds
1/4c Reduced Fat Toasted Sesame Asian Dressing
Protein of choice (I usually sauté some shrimp or chicken in soy sauce and sesame oil)
Mix the broccoli slaw and sunflower seeds. Sprinkle with the oriental seasoning from the ramen noodles. Drizzle dressing on top and mix thoroughly. Crush up the ramen noodles and place them, along with the protein, on top of the salad.
Enjoy!
P.S. Put the ramen noodles on right before eating or they lose their crunch, and their purpose, in the salad. This is especially helpful if you're taking the salad as leftovers...
Monday, September 7, 2009
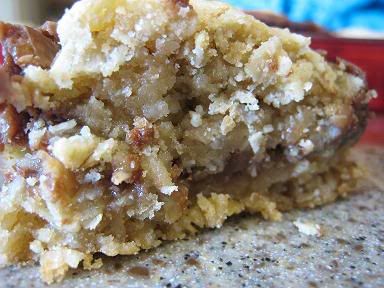
Monday Munchies - Butter Pecan Oat Bars with Chocolate Filling
Ok... last one for today!
A couple of weekends ago, my favorite little man, Ashton, spent the night with me. Ashton is the son of one of my very good friends, and I have watched him grow up since we knew he was coming into this world. I love having him over, so when his mom called and asked if I was free (which I very rarely am), I jumped at the chance because I actually had an open night on my calendar!
So I picked him up from school on Friday afternoon and we picked up some pizza (his dinner choice, of course), made a quick stop by the grocery store, and then onto the house... We were going to an outdoor movie in my neighborhood, Coraline in 3D, and I wanted to bake up some goodies for him to take with him. After looking through some blogs, and having an over-abundance of oatmeal, I decided on these bars. I found them on the Columbus Foodie blog, which is another one that always seems to have great recipes!
Butter Pecan Oat Bars with Chocolate Filling
recipe courtesy About.com
6 ounces butter (1 1/2 sticks), softened
3/4 cup dark or light brown sugar, packed
2 large eggs
2 teaspoons vanilla
1 box (18 ounces) butter pecan cake mix (I used vanilla, because it's what I had on hand)
2 1/2 cups old-fashioned rolled oats
**Filling**
1 can (15 ounces) sweetened condensed milk
1 package (12 ounces) semisweet chocolate chips
Pinch salt
2 teaspoons vanilla
1 tablespoon butter
1 cup chopped pecans
Preparation:
Heat oven to 350°. Grease and flour a 9×13x2-inch baking pan.
Beat 6 ounces of butter with the brown sugar until light; beat in eggs and 2 teaspoons vanilla. Slowly beat in the cake mix and rolled oats until well blended.
In a saucepan, combine the sweetened condensed milk with chocolate chips, a pinch of salt, and 1 tablespoon butter. Cook over medium-low heat, stirring frequently, until chocolate chips are melted and mixture is smooth. Stir in the chopped pecans.
Spread about 2/3 of the cake batter in the prepared pan. Spoon filling over the cake layer and spread to cover. Pinch pieces of the remaining batter and arrange the pieces evenly over the filling.
Bake for 25 to 30 minutes, until nicely browned and firm.
Monday Munchies - Pumpkin Pecan Pancakes
So this weekend I made a cake for one of my best friend's birthday (recipe and pics coming soon!). The cake called for 1.5 cups of pumpkin, which left 1/2 cup in the can. And all of a sudden I started craving pumpkin pancakes. Then I remembered that I had some leftover buttermilk too... which would be awesome in pancakes as well! I jumped on the computer and googled 'pumpkin buttermilk pancakes' and landed on an awesome recipe. I seriously started making these at 8:37am, and by 8:50, I was sitting at my counter enjoying them. Plus I had only used 1/2 the batter, so I had them again on Sunday morning as well... I'm sure I'll have them a few more times in the near future...

I got the recipe from Pinch My Salt, which is a great blog if you like making recipes created by others.
Oh, I forgot to mention, the recipe calls for whole wheat flour as well... so it's SUPER good for you!
Whole Wheat Pumpkin Pancakes
1 C. whole wheat flour
1/2 C. cake flour
1 t. baking soda
2 t. baking powder
1/4 t. salt
1 t. ground cinnamon
1/2 t. ground ginger
1/2 t. ground nutmeg
1 C. buttermilk
1 C. canned pumpkin puree
2 eggs
2 T. oil
1 t. vanilla
2 T. dark brown sugar
(I added pecans as well)
1. In a large bowl, whisk together the first eight ingredients (whole wheat flour through nutmeg). In a separate bowl, whisk together the last six ingredients (buttermilk through brown sugar).
2. Pour wet ingredients into dry ingredients and blend together with a wooden spoon until just combined. Lumps are ok, just make sure all the flour on the bottom of the bowl is mixed in. If batter seems too thick to pour, you can gently stir in a little more buttermilk.
3. Drop pancakes by ladleful onto a medium-hot griddle. Pancakes are ready to turn when the edges start to look a little dry and you can see small bubbles forming on the surface.
Notes: You may substitute all-purpose flour for the cake flour if that’s all you have on hand. You may also use only whole wheat flour, just increase whole wheat to 1 1/2 cups and omit cake flour; pancakes will be just a bit heavier. Light brown sugar or white sugar may be substituted for dark brown sugar. If you have it on hand, 2 teaspoons of pumpkin pie spice can be used in place of the cinnamon, ginger and nutmeg.
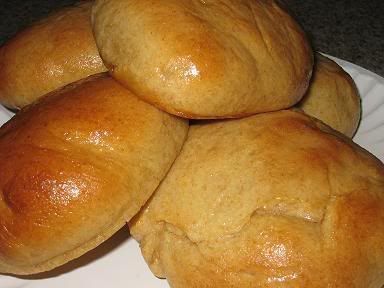
Monday Munchies - Honey Wheat Sandwich Rolls
Ok, so there will now be multiple 'Monday Munchies' posts because I have so many recipes in the backlog. I'd never get them all posted if I only post one per week. I don't think I'll hear a lot of complaints though!
So here we go with the first one... I had a group of Young Life leaders over to the house yesterday to hang out, eat way too much, etc. We had a really good time. I set up a Burger Bar and had a variety of toppings and then for dessert I set up a Gourmet Smores Bar... it was a lot of fun!
For the burger bar I had all of the traditional condiments along with queso, chili, sauteed mushrooms, caramelized onions, feta cheese, gorgonzola cheese, avacado, pico, guacamole, pesto, sundried tomato pesto, cilantro, BBQ sauce, colby jack cheese, cheddar cheese, and other stuff that I just can't recall right now... But there were so many options you didn't know where to start. Most of the guys made two burgers and most of the girls cut one burger in 1/2 and made two burger versions... It was a hit, and pretty easy to do overall...
For the Gourmet Smores Bar, I had graham crackers (which ended up being bad, so we used shortbread cookies instead!), regular marshmallows and caramel/vanilla swirl marshmallows, reese's peanut butter cups, almond joy, special dark and regular hershey bars. It was fun - most people hadn't ever stepped out of the box in regards to smores, but now they have!
But the hit of the day were the homemade hamburger buns, aka Honey Wheat Sandwich Rolls. They were SO good! I'm excited to eat the leftovers all week! I got the recipe from Annie's Eats, and she got them from Good Things Catered. I HIGHLY recommend making them. If you have a stand mixer, these are a breeze to put together!

Honey Wheat Sandwich Buns
Printer-Friendly Version
Yield: 9-10 sandwich buns
Ingredients:
1 1/4 cups milk, warmed
2 1/4 tsp. instant yeast
2 cups bread flour, plus 1/4-1/2 cup more for adjusting as needed
1 cup whole wheat flour
1/2 tsp. salt
1 egg, at room temperature
1/4 cup honey plus 1-2 tbsp., divided
2 tbsp. butter, melted
Sesame seeds (optional)
Directions:
Measure out the milk in a liquid measuring cup. Add in the instant yeast and stir to dissolve. In the bowl of a stand mixer fitted with the paddle attachment, combine the bread flour (2 cups), wheat flour and salt. Mix briefly on low speed to combine. Add the yeast-milk mixture, egg, and 1/4 cup of honey to the mixer bowl and mix on low speed just until a dough has formed. Switch to the dough hook. Continue kneading on low speed with the dough hook until the dough is smooth and tacky but not sticky, adding extra flour 1-2 tablespoons at a time as needed until the dough clears the sides of the bowl and has the desired consistency. Transfer the dough to a lightly oiled bowl, turn to coat, and cover with plastic wrap. Let rise until doubled in bulk, about 1 1/2-2 hours.
Once the dough has risen, transfer the ball to a lightly floured work surface and gently deflate the dough. Divide the dough into 9-10 equal sized pieces (if using a kitchen scale to achieve uniform size, make 3.25-3.5 oz. pieces). Form each piece of dough into a flattened round, 3.5-4 inches in diameter. Transfer the shaped rounds to a parchment- or silpat-lined baking sheet. Cover with a clean kitchen towel and let rise until nearly doubled, about 1 hour.
Preheat the oven to 350° F. Combine the melted butter with 1-2 tablespoons of honey and lightly brush the tops of the rolls. Sprinkle with sesame seeds if desired. Bake for 14-15 minutes, rotating the pan halfway through baking, until golden brown and baked through. Let cool on the baking sheet for 5 minutes, then transfer to a cooling rack to cool completely.
So here we go with the first one... I had a group of Young Life leaders over to the house yesterday to hang out, eat way too much, etc. We had a really good time. I set up a Burger Bar and had a variety of toppings and then for dessert I set up a Gourmet Smores Bar... it was a lot of fun!
For the burger bar I had all of the traditional condiments along with queso, chili, sauteed mushrooms, caramelized onions, feta cheese, gorgonzola cheese, avacado, pico, guacamole, pesto, sundried tomato pesto, cilantro, BBQ sauce, colby jack cheese, cheddar cheese, and other stuff that I just can't recall right now... But there were so many options you didn't know where to start. Most of the guys made two burgers and most of the girls cut one burger in 1/2 and made two burger versions... It was a hit, and pretty easy to do overall...
For the Gourmet Smores Bar, I had graham crackers (which ended up being bad, so we used shortbread cookies instead!), regular marshmallows and caramel/vanilla swirl marshmallows, reese's peanut butter cups, almond joy, special dark and regular hershey bars. It was fun - most people hadn't ever stepped out of the box in regards to smores, but now they have!
But the hit of the day were the homemade hamburger buns, aka Honey Wheat Sandwich Rolls. They were SO good! I'm excited to eat the leftovers all week! I got the recipe from Annie's Eats, and she got them from Good Things Catered. I HIGHLY recommend making them. If you have a stand mixer, these are a breeze to put together!
Honey Wheat Sandwich Buns
Printer-Friendly Version
Yield: 9-10 sandwich buns
Ingredients:
1 1/4 cups milk, warmed
2 1/4 tsp. instant yeast
2 cups bread flour, plus 1/4-1/2 cup more for adjusting as needed
1 cup whole wheat flour
1/2 tsp. salt
1 egg, at room temperature
1/4 cup honey plus 1-2 tbsp., divided
2 tbsp. butter, melted
Sesame seeds (optional)
Directions:
Measure out the milk in a liquid measuring cup. Add in the instant yeast and stir to dissolve. In the bowl of a stand mixer fitted with the paddle attachment, combine the bread flour (2 cups), wheat flour and salt. Mix briefly on low speed to combine. Add the yeast-milk mixture, egg, and 1/4 cup of honey to the mixer bowl and mix on low speed just until a dough has formed. Switch to the dough hook. Continue kneading on low speed with the dough hook until the dough is smooth and tacky but not sticky, adding extra flour 1-2 tablespoons at a time as needed until the dough clears the sides of the bowl and has the desired consistency. Transfer the dough to a lightly oiled bowl, turn to coat, and cover with plastic wrap. Let rise until doubled in bulk, about 1 1/2-2 hours.
Once the dough has risen, transfer the ball to a lightly floured work surface and gently deflate the dough. Divide the dough into 9-10 equal sized pieces (if using a kitchen scale to achieve uniform size, make 3.25-3.5 oz. pieces). Form each piece of dough into a flattened round, 3.5-4 inches in diameter. Transfer the shaped rounds to a parchment- or silpat-lined baking sheet. Cover with a clean kitchen towel and let rise until nearly doubled, about 1 hour.
Preheat the oven to 350° F. Combine the melted butter with 1-2 tablespoons of honey and lightly brush the tops of the rolls. Sprinkle with sesame seeds if desired. Bake for 14-15 minutes, rotating the pan halfway through baking, until golden brown and baked through. Let cool on the baking sheet for 5 minutes, then transfer to a cooling rack to cool completely.
Monday, August 31, 2009
Monday Munchies - Faux Vietnamese Coffee
BONUS! You get two recipes today! And this is one that I meant to post awhile back, but it never happened. It's SO easy to make, and so good. I keep it in my fridge and drink off of it all week long - tons cheaper than starbucks, and you only have to make it once a week.

Faux Vietnamese Coffee
10 cups of strong coffee
1 can sweetened condensed milk (I use Fat Free)
Mix together and store in the refrigerator.
Can it GET any easier than this?!?! You don't even have to add milk or sugar - it's already included!
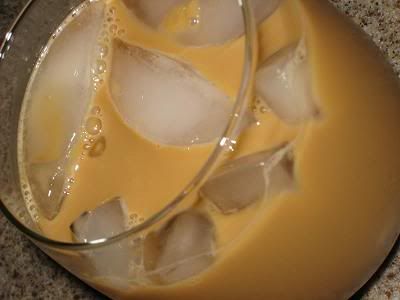
Faux Vietnamese Coffee
10 cups of strong coffee
1 can sweetened condensed milk (I use Fat Free)
Mix together and store in the refrigerator.
Can it GET any easier than this?!?! You don't even have to add milk or sugar - it's already included!
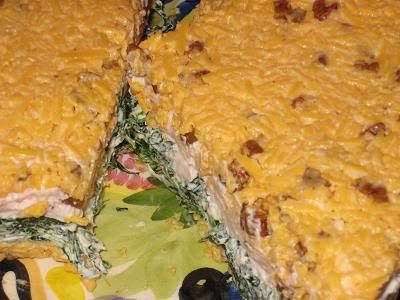
Monday Munchies - Spinach and Cheese Log
Ok, so this doesn't look too pretty, but it sure as heck tasted good! And the best part is that it was so stinkin' easy to throw together. Obviously needs to be served with crackers...

Yield
Makes 25 appetizer servings
Ingredients
1 (10-ounce) package frozen chopped spinach, thawed and drained
2 (8-ounce) blocks sharp Cheddar cheese, shredded
1/2 cup chopped pecans, toasted
1/2 cup mayonnaise
2 (8-ounce) packages cream cheese, softened and divided
1/4 teaspoon salt
1/2 teaspoon freshly ground pepper
1/4 cup strawberry preserves
Garnish: toasted chopped pecans
Preparation
Line a 9- x 5-inch loafpan with heavy-duty plastic wrap.
Press spinach between layers of paper towels to remove excess moisture; set aside.
Stir together Cheddar cheese, pecans, and mayonnaise; spread half of mixture evenly into prepared pan. Stir together spinach, 1 package cream cheese, salt, and pepper; spread evenly over Cheddar cheese layer. Stir together remaining package cream cheese and strawberry preserves; spread evenly over spinach layer. Top with remaining Cheddar cheese mixture. Cover and refridgerate or freeze up to 1 month. Thaw in refrigerator overnight. Garnish, if desired, and serve with assorted crackers.
Prep: 15 min., Thaw: 8 hrs.
To make two loaves, use two(7- x 3-inch) loafpans. Mix ingredients as directed; divide mixtures in half, and follow layering procedure for each loaf.
Monday, August 24, 2009
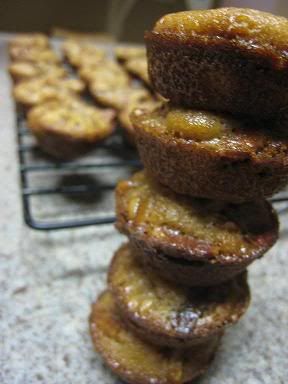
Monday Munchies - Pecan Pie Bites
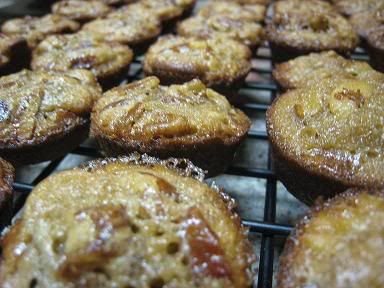
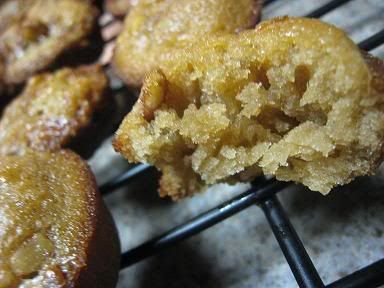
I found the recipe for these little gems at some point last year, and they became my 'go-to' recipe - I made them for everything - including Thanksgiving Day! My dad is pretty picky when it comes to food to say the least, and was very skeptical when I brought these for the 'pecan pie dessert'. I told him to trust me - that when he got done with one bite, he would realize that he had just tasted a pecan pie, without the gooeyness! He ended up loving them - and had me leave all of the left overs so he could take them in his lunch throughout the next week - they were his favorite dessert out of everything I brought last year...

Even if you prefer the gooey traditional pecan pie, make these anyways - they are definitely more transportable than your typcial pie. And bite size. And cute. And well... just make them. Trust me!

Pecan Pie Bites
INGREDIENTS
1 cup packed light brown sugar
1/2 cup all-purpose flour
1 cup chopped pecans
2/3 cup butter, softened
2 eggs, beaten
Add to Recipe Box
DIRECTIONS
1.Preheat oven to 350 degrees F (175 degrees C). Grease and flour 18 mini muffin cups (use LOTS of Bakers Joy)
2.In a medium bowl, stir together brown sugar, flour and pecans. In a separate bowl beat the butter and eggs together until smooth, stir into the dry ingredients just until combined. Spoon the batter into the prepared muffin cups. Cups should be about 2/3 full.
3.Bake at 350 degrees F (175 degrees C) for 20 to 25 minutes. Cool on wire racks when done.
Even if you prefer the gooey traditional pecan pie, make these anyways - they are definitely more transportable than your typcial pie. And bite size. And cute. And well... just make them. Trust me!
Pecan Pie Bites
INGREDIENTS
1 cup packed light brown sugar
1/2 cup all-purpose flour
1 cup chopped pecans
2/3 cup butter, softened
2 eggs, beaten
Add to Recipe Box
DIRECTIONS
1.Preheat oven to 350 degrees F (175 degrees C). Grease and flour 18 mini muffin cups (use LOTS of Bakers Joy)
2.In a medium bowl, stir together brown sugar, flour and pecans. In a separate bowl beat the butter and eggs together until smooth, stir into the dry ingredients just until combined. Spoon the batter into the prepared muffin cups. Cups should be about 2/3 full.
3.Bake at 350 degrees F (175 degrees C) for 20 to 25 minutes. Cool on wire racks when done.
Monday, August 17, 2009
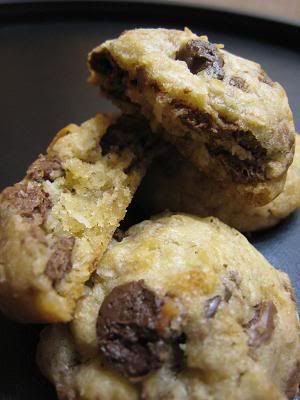
Monday Munchies - Almond Joy Cookies
And...we're back! Here we are with the first ever Monday Munchies - I really hope that having a plan helps me to get back into the swing of blogging. Blogging random things just didn't work for me - either I just rambled on and on about things no one cares about, or I was so sporadic that no one really came back to check this thing... hopefully it'll be different this time, and hopefully I post stuff you're actually interested in!
Today's recipe are for some cookies that I've dubbed 'Almond Joy Cookies'. I made them for my Young Life girls for a recent trip we took to the Hill Country and they were gobbled up! I got the recipe from Jamie at My Baking Addiction - one of my favorite recipe blogs! Her recipe was for Coconut Pecan Chocolate Chip Cookies, but I left out the pecans because I didn't know if anyone had nut allergies. And I used milk chocolate in place of semi-sweet/bittersweet. So when I bit into it, it tasted much like an Almond Joy after you've picked off the chocolate-covered almond on top and are eating just the little bar... Yum!
Almond Joy Cookies
Adapted from My Baking Addiction
Yields 4 dozen cookies (if you make them small)
Ingredients
2 cups + 2 TBSP all purpose flour
1/2 tsp baking powder
1/2 tsp salt
12 TBSP unsalted butter, melted and cooled until warm
1 cup packed brown sugar
1/2 cup granulated sugar
1 large egg
1 large egg yolk
1 tsp vanilla
1 1/2 cups chocolate chips (I used chopped milk chocolate)
3/4 cup sweetened flaked coconut
Nuts optional - add one almond on top for the full effect of an Almond Joy, or add in a cup of pecans to follow the original recipe
Directions
1. Preheat oven to 350*F
2. Cover cookie sheets with parchment paper, or use a well worn baking stone
3. Mix flour, baking powder and salt in a bowl and set aside
4. Mix butter and sugars with a mixer until blended and smooth. Add egg, egg yolk & vanilla and mix until fully incorporated.
5. Add dry ingredients and mix until just combined.
6. Stir in chocolate, coconut and nuts if desired.
7. Using a medium cookie scoop, scoop out dough and place on cookie sheets.
8. Bake for 12-18 minutes (mine took 14 minutes and because they were smaller than the original recipe).
9. Cool on cookie sheets to maintain texture.
I hope you enjoy these as much as me and my girls did...
Have a wonderful day - hope you find many reasons to smile!
-Reneé
Subscribe to:
Posts (Atom)