Thursday, April 28, 2011

The Best Carrot Cake. Ever.


So it's a friend's birthday today and on a whim I decided to whip up one of my most requested cakes. Not to mention, it's not on the blog yet - why have I been holding out on y'all?!?!


And to be 100% honest - I just found this recipe a few years back. I haven't made ANY modifications. It simply doesn't need any. It's that good. Just make it. You can thank me later...

Pumpkin Carrot Cake

Ingredients
2 cups all-purpose flour
2 teaspoons baking soda
2 teaspoons ground cinnamon
1/2 teaspoon salt
3/4 cup milk
1 1/2 teaspoons lemon juice
3 large eggs
1 1/4 cups LIBBY'S® 100% Pure Pumpkin
1 1/2 cups granulated sugar
1/2 cup packed brown sugar
1/2 cup vegetable oil
1 can (8 oz.) crushed pineapple, drained
1 cup (about 3 medium) carrots, grated
1 cup coconut, flaked
1 1/4 cups nuts, chopped, divided
Cream Cheese Frosting (recipe follows)

Directions
PREHEAT oven to 350° F. Grease two 9-inch-round cake pans.

COMBINE flour, baking soda, cinnamon and salt in small bowl. Combine milk and lemon juice in liquid measuring cup (mixture will appear curdled).

BEAT eggs, pumpkin, granulated sugar, brown sugar, oil, pineapple, carrots and milk mixture in large mixer bowl; mix well. Gradually add flour mixture; beat until combined. Stir in coconut and 1 cup nuts. Pour into prepared cake pans.

BAKE for 30 to 35 minutes or until wooden pick inserted in center comes out clean. Cool in pans for 15 minutes. Remove to wire racks to cool completely.

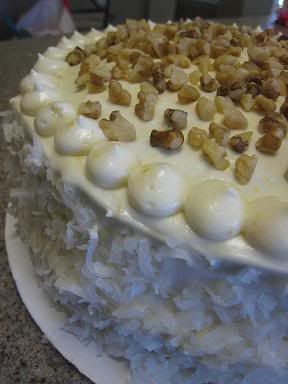
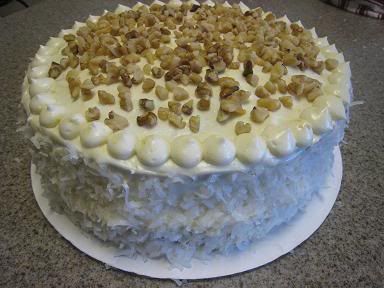
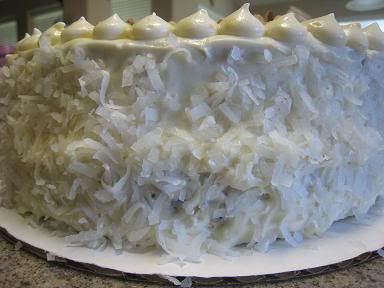
FROST between layers, on sides and top of cake with Cream Cheese Frosting. Garnish with remaining nuts. Store in refrigerator.

FOR CREAM CHEESE FROSTING:COMBINE 11 ounces softened cream cheese, 1/3 cup softened butter and 3 1/2 cups sifted powdered sugar in large mixer bowl until fluffy. Add 1 teaspoon vanilla extract, 2 teaspoons orange juice and 1 teaspoon grated orange peel; beat until combined.


Peppermint Oreo Stuffed Brownie Truffles

Hi. It's been awhile. Thought I'd make it up to you by giving you a recipe with the longest title ever! These aren't for the faint of heart - they're not difficult, just time consuming...

So I was blog perusing the other day and came upon Cookie and Cups stuffed brownie truffles. She'd used Rolos, cookie dough, mini Reese's and mini candy bars - I decided to incorporate 2 recipes I've been wanting to try - Oreo Balls and these Stuffed Brownie Truffles.

I started by baking a box mix of brownies according to the directions on the box. I baked them on an 11x17 pan so they were thin and baked up quickly. It's imperative that you don't overbake the brownies! Once baked, let them cool completely.

While those were in the oven I whipped up a recipe of Oreo Balls (crumble a package of oreos in the food processor (set aside 1/4c), then add 8oz of cream cheese and process into a course mixture again) using Trader Joe's Candy Cane Joe Joe's (their version of oreos, only available at Christmas time). Another option would be to use regular oreos and simply add a few drops of peppermint extract in along with the cream cheese. Once processed, I rolled these into 1/2" balls and put them in the freezer to harden.

(I actually covered the brownies and didn't come back to these until the next day. You can space them out according to your schedule.)

The next day I crumbled the baked brownies by hand and then took an oreo ball and wrapped the brownie crumbles around it - it took some finagling, but it works - just be patient and it comes together! At the end each ball was ~1" in diameter. I put them in the freezer to harden.

(I left them overnight and did the next step the next morning.)

For the final step I melted some candy melts (I used the white mint flavor to give them an extra punch of mint) in a double boiler on the stove with a couple tablespoons of crisco (add crisco to make the mixture more fluid and 'drippy' - want it to coat the spoon, not clump to it), dipped the brownie truffles in the melted chocolate and set them on wax paper. I sprinkled the tops with the reserved crumbled oreos from the first day.

And that's it! Like I said, takes some time, but it can be done in stages, and while you're watching tv, etc.

Enjoy!